sitemap with some detail for blogger

By: // No comments:
On the other hand, HTML sitemaps are created with plain Hyperlink Text Markup Language and are especially intended for your website visitors. It is usually used to list all the post or pages that are published on your site.

You can check the demo of this widget here.

Adding an HTML Sitemap With All Posts in Blogger:

To add a HTML sitemap in blogger please follow the below instructions correctly:
  1. The very first thing you need to do is to  add the CSS codes so you can make your sitemap look attractive. Go to Blogger >> Template >> Edit HTML >> Search for ]]></b:skin> tag and just above it paste the following code. You can also customize the below codes to match your style of template color scheme:

    /* Sitemap plugin By MyBloggerLab */
    #bp_toc {
        color: #666;
        margin: 0 auto;
        padding: 0;
        border: 1px solid #d2d2d2;
        float: left;
        width: 100%;
    }
    span.toc-note {
        display: none;
    }
    #bp_toc tr:nth-child(2n) {
        background: #f5f5f5;
    }
    td.toc-entry-col1 a {
        font-weight: bold;
        font-size: 14px;
    }
    .toc-header-col1,
    .toc-header-col2,
    .toc-header-col3  {
    background:#9E9E9E;
    }
    .toc-header-col1 {
        padding: 10px;
        width: 250px;
    }
    .toc-header-col2 {
        padding: 10px;
        width: 75px;
    }
    .toc-header-col3 {
        padding: 10px;
        width: 125px;
    }
    .toc-header-col1 a:link,
    .toc-header-col1 a:visited,
    .toc-header-col2 a:link,
    .toc-header-col2 a:visited,
    .toc-header-col3 a:link,
    .toc-header-col3 a:visited {
        font-size: 13px;
        text-decoration: none;
        color: #fff;
        font-weight: 700;
        letter-spacing: 0.5px;
    }
    .toc-header-col1 a:hover,
    .toc-header-col2 a:hover,
    .toc-header-col3 a:hover {
        text-decoration: none;
    }
    .toc-entry-col1,
    .toc-entry-col2,
    .toc-entry-col3 {
        padding: 5px;
        padding-left: 5px;
        font-size: 12px;
    }
    .toc-entry-col1 a,
    .toc-entry-col2 a,
    .toc-entry-col3 a {
        color: #666;
        font-size: 13px;
        text-decoration: none
    }
    .toc-entry-col1 a:hover,
    .toc-entry-col2 a:hover,
    .toc-entry-col3 a:hover {
        text-decoration:underline;
    }
    #bp_toc table {
        width: 100%;
        margin: 0 auto;
        counter-reset: rowNumber;
    }
    .toc-entry-col1 {
        counter-increment: rowNumber;
    }
    #bp_toc table tr td.toc-entry-col1:first-child::before {
        content: counter(rowNumber);
        min-width: 1em;
           min-height: 3em;
        float: left;
        border-right: 1px solid #fff;
        text-align: center;
        padding: 0px 11px 1px 6px;
        margin-right: 15px;
    }
    td.toc-entry-col2 {
        text-align: center;
    }

  2. Once everything is done, press Save Template button present at the very top of your screen.

  3. Now Simply create a new page where you want to display your sitemap. Go to Blogger >> Pages >> New page. In the Blogger page editor, select HTML tab and paste the following code in the HTML code editor:

    <div id="bp_toc">
    </div>
    <script src='http://mybloggerlab.com/js/sitemap.js'  type="text/javascript"></script>
    <script src="/feeds/posts/summary?alt=json-in-script&amp;max-results=9999&amp;callback=loadtoc" type="text/javascript"></script>

  4. After pasting the above code, you can write a title of your page. If you wish you can also disable comments because you would not like people posting comments on your sitemap. Once everything is done, press Publish button.
We hope this article helped you learn how to add an HTML sitemap page in Blogger. If you enjoyed this article please share your thoughts in comments section below.

Adsense Appear In Middle Of Blogger Posts (New and Old) Without Using Post Template Feature

By: // No comments:
In my previous post, I explained how to easily place Adsense ads in middle of Blogger posts using the Blogger "Post Template" feature. Although the trick is very easy to implement and automatically displays ad in desktop and mobile view, the trick doesn't display the ads in old posts.


If you want the ad to display in the middle of all posts (old and new), you will have to hack your blog's html and add some codes to it. I stumbled on the trick here, implemented it and works fine on my blog. I even use the trick to make Adsense ads appear in the middle of posts on Blogger mobile view.

This script in the trick actually looks for number of <br/>  (line break) tags inside your post and display ad unit.
adsense in middle


How To Get Started

==> Generate your Adsense ad code from www.google.com/adsense
==> Parse the Adsense ad code at www.freehtmlparser.blogspot.com (paste and click "Encode")
==> Login to your Blogger dashboard and back up your template ( Very Important! )
==> Go to "Template" > "Edit HTML"

==> Use CTRL F to search your HTML for the JQuery script below:

<script src='https://ajax.googleapis.com/ajax/libs/jquery/1.9.1/jquery.min.js' type='text/javascript'/>

If it exists, move on to the next step. If not, copy the script above and paste directly above </body> in your blog's html

==> Use CTRL F to find </body> again and directly above it, paste the code highlighted below:


<b:if cond='data:blog.pageType == &quot;item&quot;'>
<script>
 $AdCode = $("#AdCode").html();
 $("#PostBody br:lt(1)").replaceWith($AdCode);
 $("#AdCode").remove();
</script>
</b:if>

==> Save the Template

==> Go back to "Template" > Edit HTML. Use CTRL F to find <data:post.body/> . Replace it with the code below:

<div id="PostBody">
 <data:post.body/>
</div>


<div id="AdCode">
<div style='margin:5px 0;text-align:center;clear:both;'>
 <!-- Paste PARSED Ad Unit Code Here -->
</div>
</div>

==> Save the template

NB: Your template might have 2 or more <data:post.body/> codes. You have to identify correct one by using "try and error" trick. The 2nd or 3rd instance works in most templates though.

==> Go to "New Post" > "Options". Ensure you select "Press Enter for line breaks".


That's all.

To make it appear on mobile view, find <b:includable id='mobile-post' var='post'> in your HTML and replace the <data:post.body/> under the line as explained above.

I hope it works for you.

If it doesn't work for you, you can simply revert the changes by uploading the back up you created before implementing the trick.
By: // No comments:
Arrow
White Box


How To Add Breadcrumb in Blogger Blog HTML in 1 Minute

By: // No comments:

How to add breadcrumb in Blogger blog


Search <div class='blog-posts hfeed'> and paste the code after it..

<!--breadcrumbs start--><b:if cond='data:blog.pageType == &quot;item&quot;'><p class='breadcrumbs'><span class='post-labels'><a expr:href='data:blog.homepageUrl' rel='tag'>Home</a><b:loop values='data:posts' var='post'><b:if cond='data:post.labels'><b:loop values='data:post.labels' var='label'><b:if cond='data:label.isLast == true'> &#187;<a expr:href='data:label.url' rel='tag'><data:label.name/></a></b:if></b:loop><b:else/>&#187; Unlabelled</b:if>&#187; <span><data:post.title/></span></b:loop></span></p></b:if><b:if cond='data:blog.pageType == &quot;static_page&quot;'><p class='breadcrumbs'><a expr:href='data:blog.homepageUrl'>Home</a> &#187; <data:blog.pageName/></p></b:if><b:if cond='data:blog.pageType == &quot;archive&quot;'><p class='breadcrumbs'><a expr:href='data:blog.homepageUrl'>Home</a> &#187; <data:blog.pageName/></p></b:if><b:if cond='data:blog.searchLabel'><p class='breadcrumbs'><a expr:href='data:blog.homepageUrl'>Home</a> &#187; <data:blog.pageName/></p></b:if><!--breadcrumbs end-->

How To Make Archive As A Site Map For Blogger BlogSpot 2017

By: // No comments:

How To Make Archive As A Site Map For Blogger BlogSpot

Its Very Easy No need to worry about . please follow thses steps one by one to get desired results.

Step 1: Create A New Page

Open your blog and go to PAGES and click on NEW PAGE. (Fig. 1)
Create an Archive Page for Blogger
Fig. 1

Name your new page however you want it. But I suggest you put a page name that is clear for your readers to know what the page is all about. Then click on the button that says HTML. (Fig. 2)
Create an Archive Page for Blogger
Fig. 2


Step 2: Copy and Paste

Now you need to copy and paste the following code into your HTML field.

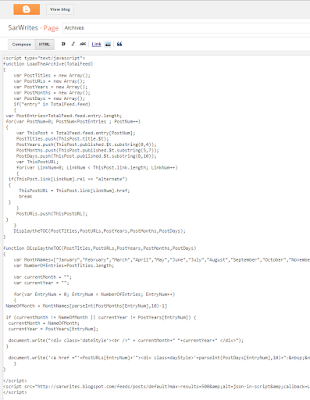
<script type="text/javascript">function LoadTheArchive(TotalFeed)
{
var PostTitles = new Array();
var PostURLs = new Array();
var PostYears = new Array();
var PostMonths = new Array();
var PostDays = new Array();
if("entry" in TotalFeed.feed)
{
var PostEntries=TotalFeed.feed.entry.length;
for(var PostNum=0; PostNum<PostEntries ; PostNum++)
{
var ThisPost = TotalFeed.feed.entry[PostNum];
PostTitles.push(ThisPost.title.$t);
PostYears.push(ThisPost.published.$t.substring(0,4));
PostMonths.push(ThisPost.published.$t.substring(5,7));
PostDays.push(ThisPost.published.$t.substring(8,10));
var ThisPostURL;
for(var LinkNum=0; LinkNum < ThisPost.link.length; LinkNum++)
{
if(ThisPost.link[LinkNum].rel == "alternate")
{
ThisPostURL = ThisPost.link[LinkNum].href;
break }
}
PostURLs.push(ThisPostURL);
}
}
DisplaytheTOC(PostTitles,PostURLs,PostYears,PostMonths,PostDays);
} function DisplaytheTOC(PostTitles,PostURLs,PostYears,PostMonths,PostDays)
{
var MonthNames=["January","February","March","April","May","June","July","August","September","October","November","December"];
var NumberOfEntries=PostTitles.length; var currentMonth = "";
var currentYear = ""; for(var EntryNum = 0; EntryNum < NumberOfEntries; EntryNum++)
{
NameOfMonth = MonthNames[parseInt(PostMonths[EntryNum],10)-1] if (currentMonth != NameOfMonth || currentYear != PostYears[EntryNum]) {
currentMonth = NameOfMonth;
currentYear = PostYears[EntryNum]; document.write("<div class='dateStyle'><br />" + currentMonth+" "+currentYear+" </div>");
} document.write('<a href ="'+PostURLs[EntryNum]+'"><div class=dayStyle>'+parseInt(PostDays[EntryNum],10)+":&nbsp;&nbsp;</div> "+PostTitles[EntryNum]+"</a><br />");
}
}
</script> <script src="http://YOURBLOGHERE.blogspot.com/feeds/posts/default?max-results=500&amp;alt=json-in-script&amp;callback=LoadTheArchive" /></script> <!--CUSTOMIZATION--><style type="text/css">.dateStyle {
color:#000;
font-weight:bold;
font-size: 15px;
font-family: Arial, sans-serif;
margin: 0;
} .dayStyle {
color:#000;
font-weight:bold;
font-family: Arial, sans-serif;
display: inline-block;
} </style>
It should look like the one below:
Create an Archive Page for Blogger
Click image to enlarge

Step 3: Customize

Don't freak out! It's just easy.

First you have to look for this:
Create an Archive Page for Blogger
Click anywhere on the HTML box and hit CTRL + F and type YOURBLOGHERE to find the url that is to be changed easily

Change YOURBLOGHERE.blogspot.com into your web address.

From here, you may publish the page now. Or you can customize its look further.

Just look for the the CSS code at the bottom-most part and customize the highlighted parts according to your preference.
Create an Archive Page for Blogger
Do not alter the class names e.g. (.dateStyle/.dayStyle)
If you aren't really familiar with CSS, just edit the values between : and to be safe.

For example, if you want to change the font color, just change color: #22a9b1; to color: #006DD9; or you may use the names of the colors instead of hexcodes like, color: pink;

Step 4: Publish the page and you're good to go!


That's it. I hope this helps. Please let me know if it works for you. And if you have questions regarding this matter, don't hesitate to hit me a comment.
If you find this helpful, spread the love and share. :) 

Place Adsense Ads Automatically In Middle of All The Posts In Blogger:

By: // No comments:

Place Adsense Ads Automatically In Middle of All The Posts In Blogger:

Follow The below process to place adsense ads in Middle of all the posts automatically in blogger.

Step 1:

Login to Your Blogger Account
Go to Template >Edit HTML

Step 2:

Search For Below Code in your template.
<data:post.body/>
You will get multiple codes similar to above code. You have to select the second code which is similar to above code in order to make the script work properly.

Step 3:

Replace The above Code With The Below Code.
<div id='jobmiddlenew'>

 <data:post.body/>

          </div>

<b:if cond='data:blog.pageType == &quot;item&quot;'>

<style>
#addcodemiddle{display: none;}
</style>
<div id='addcodemiddle'>

Place Your Ad Code Here

    </div>

 <script type='text/javascript'>


var str1=document.getElementById(&quot;jobmiddlenew&quot;).innerHTML;
var str2=str1.length;
var str3=str2/2;
var substr = str1.substring(str3, str2);

var n = substr.search(&quot;&lt;br&gt;&quot;);
if(n&lt;0)
{
n = substr.indexOf('.');
if(n&lt;0)
{
n=0;
}
var firsthalf = str1.substring(0, str3+n+1);
var secondhalf = str1.substring(str3+n+1, str2);

}
else
{

var firsthalf = str1.substring(0, str3+n+4);
var secondhalf = str1.substring(str3+n+4, str2);
}
var addcode=&quot;<center>&quot;+document.getElementById(&quot;addcodemiddle&quot;).innerHTML+&quot;</center><br/>&quot;;

var newbody=firsthalf+addcode+secondhalf;


var strnew=document.getElementsByClassName(&quot;post-body entry-content&quot;);
strnew[0].innerHTML=newbody;

document.getElementById(&quot;addcodemiddle&quot;).innerHTML=&quot;&quot;;

</script>

  </b:if>

Step 4

Replace The Place Your Ad Code Text With Your Adsense Ad Code in the above code and save your template.

About Our Blog